I design the pattern on A3 size paper.
The first step is to design the three main panels that will make up the body of the bag.
The centre panel is slightly larger than the sides as this is the focal one that we will later paint with cute designs.
The lining will not be cut in three different panels and need its own pattern piece.
I then design the sling and zipper flaps.
Now it is time to consider pockets inside the bag.
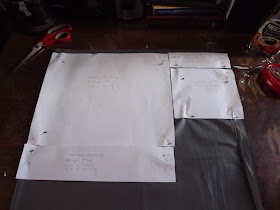
This is what the pattern pieces look like when laid out side by side.
Some of the pattern pieces did not fit onto one piece of paper and now need to be extended. I do this with double-sided tape.
The pattern made provision for the overlap in the extensions of the pattern pieces.
As I intend to make four bags with painted panels, I cut eight panels from 100 % cotton sheeting to be painted. Pure fabrics are less likely to wash out than blended ones and therefore this makes the extra expense well worth it.
I also cut two centre panels from this fabric with its bicycles...
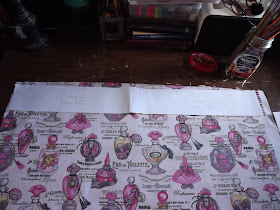
... as well as from this one with its perfume bottles. I will be making six bags and cut the fabric for all six in one go.
I cut side panels for one bag from the bicycle fabric.
I cut side panels for a second bag from the fabric with the perfume bottles.
I cut the side panels for the remaining four bags from black fabric.
The zipper flaps for four bags are cut from black.
One bag's zipper flaps are cut from the fabric with the perfume bottles.
The last bag's zipper flaps are cut from the fabric with the bicycles.
Four slings are cut from black.
One sling is cut from the perfume bottles.
One sling is cut from the bicycles.
I then cut the lining pieces for two bags from this poly-cotton fabric.
Two more bags have their linings cut from a blue version of the same fabric.
The last two bags have their lining cut from a plain grey. All the pieces are now cut and the construction of the bags can begin. I tell you more about this in the next blog.
Here is a preview of what one of the bags look like when finished. This is a view of the inside of the bag.
One side of the bag.
The reverse side of the same bag.
You can purchase Designs By Miekie 1 here.
Jy kan Kom Ons Teken en Verf Tuinstories hier koop.
Jy kan Kom Ons Kleur Tuinstories In hier koop.
Jy kan Tuinstories hier koop.
You can follow Miekie's daily Bible Study blog, Bybel Legkaart, here in English & Afrikaans.
You may prefer to follow the traveling blog, A Pretty Tourist.
For more crafty ideas and great product reviews, visit A Pretty Talent on Facebook.
If you are in a literary mood, follow Miekie's musings, stories and poetry on A Pretty Author - Miekie.
Remember to keep nurturing your TALENT for making life PRETTY.
You can subscribe to any of these blogs and receive regular updates by email. Simply register your email address at the top of the applicable blog.


No comments:
Post a Comment