You can read Part One and Part Two here.
Cut 2 pieces of fabric for the bag.
Remember to cut the opening for the handle.
Cut 2 pieces from the lining as well.
Cut 6 pieces of lining for the pockets.
I wanted to make sure that I would get these lovely flowers on the pockets. It meant that I would wate some fabric, but this was not a time to be frugal.
I cut the 2 pieces needed for the pockets separately to make sure I got the flowers in place
Cut two pieces for the flap.
Cut one piece of vilene for the flap.
Lie the pieces of the pockets together with right sides facing.
Sew along the top of the pockets.
Do this for both the outer and inner pockets. There are four pockets all together.
Fold the pockets over and iron the top seam flat.
Lie the pockets on the main bag and pin in place. Divide the pocket in three equal distances. Sew from the bottom to the top to divide each pocket into three smaller pockets.
Do this with both the inside and outside pockets.
Here you can see more clearly how I sewed the pockets.
To make the flap, sew around three sides of the flap, laying the fabric down with right sides facing.
Cut the corners away.
Turn the flap inside out.
Iron flat.
Mark the size of the button.
Mark the space for the button.
Sew the buttonhole.
Open the buttonhole.
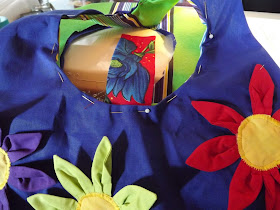
Pin the petals out of the way that run the risk of getting caught in the side seams of the bag.
Line up the pockets and pin down the sides of the bag.
Pin around the bottom of the bag.
Only pin up to where the handles start curving inwards.
Sew all around the bag between the pins.
Cut the corners away.
Fold the corners in and flatten them.
Sew the corners flat.
When you turn the bag right side out, the base will now have squared out.
Do the same with the lining now.
Pin the corners of the lining down.
Sew the corners of the lining.
With right sides facing, put the bag inside the lining.
Pin the handles of the lining and the bag together all the way round.
Sew from one end all the way around to end at the same spot.
Cut away the excess fabric in the seams of the handles on the curves.
Turn the bag right ride out.
Pin the openings of the handles in.
Insert the flap into one of the openings.
Sew the openings by hand.
Sew the button on by hand.
Enjoy your new bag!
Marietjie Uys (Miekie) is a published author. You can buy my books here:
You can purchase Designs By Miekie 1 here.
Jy kan Kom Ons Teken en Verf Tuinstories hier koop.
Jy kan Kom Ons Kleur Tuinstories In hier koop.
Jy kan Tuinstories hier koop.
You can follow Miekie's daily Bible Study blog, Bybel Legkaart, here in English & Afrikaans.
You may prefer to follow the traveling blog, A Pretty Tourist.
For more crafty ideas and great product reviews, visit A Pretty Talent on Facebook.
If you are in a literary mood, follow Miekie's musings, stories and poetry on A Pretty Author - Miekie.
Remember to keep nurturing your TALENT for making life PRETTY.
You can subscribe to any of these blogs and receive regular updates by email. Simply register your email address at the top of the applicable blog.


No comments:
Post a Comment