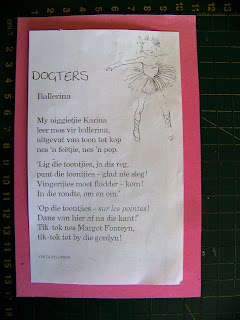
I asked my sister-in-law to give me a copy of the poem that was recited, the programme for the day as well as a photo of my niece to incorporate in the layout.
I carefully cut all around the ballerina to get rid of the distracting white background.
This is a much better shape to work with.
I find paper that incorporates the colours of the programme as well as the dress my niece was wearing. The ballerina was already coloured with this is mind. I also found two border embellishments to use on the sides of the pages. I lay the ballerina on the paper to test the effect. This will work quite nicely.
I crop the poem to keep only the necessary bits.
The programme is matted to a piece of pink paper, cropped to the desired size.
The poem is matted in the same way.
The photo receives the same treatment for uniformity sake.
I use Tim Holtz Distress Ink in Milled Lavender to ink the edges of the different elements.
Inking simply involved lightly pulling the edges of the paper over the ink pad.
I use double-sided tape to secure all the paper bits to each other.
My paper elements are now ready to go onto the layout.
I plan the layout carefully, allowing some overlap to make it a little more interesting.
I also found a sticker with the symbol she received on her certificate.
This sticker, which describes my niece to a tee, gave me the opportunity to repeat the use of the split pins. Repetition is always a good idea as it ties the different elements together.
Little girls love bling and they love hearts. Adding rhinestones was a no-brainer.
I included a couple of foam rubber flowers which given a little more splendour by adding rhinestones.
A foam rubber princess with glitter goes very well on a girly page.
In very little time and with very little cost, we have created a beautiful layout that captures these precious memories for time to come.
Marietjie Uys (Miekie) is a published author. You can buy my books here:
You can purchase Designs By Miekie 1 here.
Jy kan Kom Ons Teken en Verf Tuinstories hier koop.
Jy kan Kom Ons Kleur Tuinstories In hier koop.
Jy kan Tuinstories hier koop.
You can follow Miekie's daily Bible Study blog, Bybel Legkaart, here in English & Afrikaans.
You may prefer to follow the traveling blog, A Pretty Tourist.
For more crafty ideas and great product reviews, visit A Pretty Talent on Facebook.
If you are in a literary mood, follow Miekie's musings, stories and poetry on A Pretty Author - Miekie.
Remember to keep nurturing your TALENT for making life PRETTY.
You can subscribe to any of these blogs and receive regular updates by email. Simply register your email address at the top of the applicable blog.


No comments:
Post a Comment