Summer is a great time for pool parties. Next time your child is invited to a children's pool party, why not make the hostess a cute mermaid card to thank or congratulate her? I show you how easy it is to colour the design and make the card in today's blog. The design is taken from my book Designs By Miekie 1.
As my printer is still acting up, I trace the design I've selected for today's project by hand onto A4 printer paper.
Tracing the design, simply means that I position the original underneath the paper and trace along the lines showing through from below. If you feel confident, you can do it in pen, otherwise start with a pencil.
Easy as pie! This is also a great skill development exercise to do with kids. So be sure to involve them in similar exercises.
I will colour the design with Derwent Coloursoft pencils.
Oddly enough, I start on the background, using a technique we've probably all used at school. I sharpen only the tip of the pencil very finely onto the paper. Remove any wooden debris that may accidentally fall onto the paper.
Use a tissue to gently rub the colour onto the background. The result is so pale that it would not matter much if you crossed over the lines from time to time.
With the background coloured, I move onto the hair of the mermaid. This is 'coloured' in two colours by drawing lines following the direction of the hair.
I shade the flesh parts in two shades of light pink.
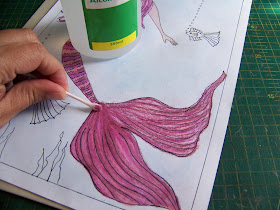
The mermaids tail is coloured in three shades of pink.
The fin part of the tail is once again coloured by drawing lines using the three colours used in the upper part of the tail. I then use rubbing alcohol to blend all of the colouring, aside from the background.
The seaweeds are done in three different greens.
This is also blended with rubbing alcohol.
I then colour and blend the fish in warm orange and yellow tones.
The bubbles are done in a dark blue.
My picture is now finished and ready to be used on a card.
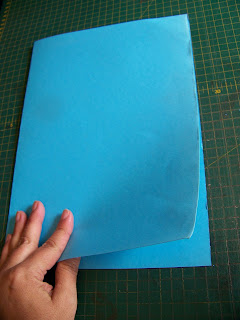
I will be using a blue A3 sized sheet of cardboard for the card.
This is folded in half to form the card.
The design is then carefully cut out along the frame.
It is stuck down on the card using double-sided tape.
I paint the mermaid's tail with Teddy Glitter paint and set it aside to dry. This will give the tail a surprising and vibrant sheen.
A row of rhinestones are glued to the side of the card. This repeats the bubbles rising from the fish, and also adds a bit of bling to an otherwise rather dull card.
Not much more is needed after this, aside from some witty writing on the inside of the card.
Marietjie Uys (Miekie) is a published author. You can buy my books here:
You can purchase Designs By Miekie 1 here.
Jy kan Kom Ons Teken en Verf Tuinstories hier koop.
Jy kan Kom Ons Kleur Tuinstories In hier koop.
Jy kan Tuinstories hier koop.
You can follow Miekie's daily Bible Study blog, Bybel Legkaart, here in English & Afrikaans.
You may prefer to follow the traveling blog, A Pretty Tourist.
For more crafty ideas and great product reviews, visit A Pretty Talent on Facebook.
If you are in a literary mood, follow Miekie's musings, stories and poetry on A Pretty Author - Miekie.
Remember to keep nurturing your TALENT for making life PRETTY.
You can subscribe to any of these blogs and receive regular updates by email. Simply register your email address at the top of the applicable blog.


No comments:
Post a Comment