Fabric Tape
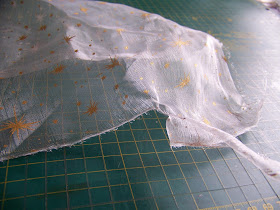
I am going to start with organza. Since organza is transparent, it is a fabric we often shy away from. Yet it is very easy to use. Make a small snip in the side.
Now simply tear the fabric strip off. This should ensure the straightest length of fabric. More so than cutting would.
Hold the organza to a flame to melt the ends and to prevent it from fraying. Organza is very flammable and melts into a plastic. Take care not to burn yourself.
I then cut a strip of satin from my fabric stash. I start by drawing a pencil line where I want to cut. This will make it easier to cut a straight line.
Cut the strip of fabric.
Satin can also be held to a flame to melt the ends and keep it from fraying. Other fabrics, such as cotton, or linen, can be used with equal success. Instead of melting the edges, I suggest you cut it with scissors that has a zigzag blade. This will also prevent fraying.
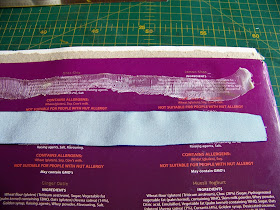
I lay the fabric down on a the packaging of a biscuit box. The plastic coating that the box is treated with will make it easy for me to lift my tape from it, without loosing its ability to stick.
There really are two brilliant options for making the 'tape' sticky. The most obvious is to use double-sided tape. Tape that has been made with double-sided tape, can be rolled up again and used when ready. The other alternative is to find a glue that can dry to be repositioned. Tombow is such a glue. If left undisturbed the glue will dry into one of the strongest fixes I know. Yet, if you lift just before completely dry, it leaves the glued object sticky, without being stuck down, making it possible to reposition the item. I opted to use the glue on the two strips of fabric to illustrate this better. I leave the glued fabric on my cardboard and will return to it nearing the end of the project, allowing the glue to dry.
Lace Tape
Perhaps you found a beautiful piece of lace that you would like to turn into a tape. Once again, you have the option of glue or double-sided tape.
Ribbon Tape
Any ribbon can easily be turned into tape, using the same principles of glue or double-sided tape.
This time I used double-sided tape, which I simply stuck to the back of the ribbon.
I then rolled the ribbon up again and stored it for later use.
Washi Tape
Washi Tape originated with the Japanese who printed pretty designs on masking tape. That means that if you have a roll of inexpensive masking tape, you can make your own personalized washi tape! I will share three ideas with you to spark your own creativity. I begin by sticking three lengths of masking tape to my plastic coated cardboard.
Perhaps you don't like the colour of the masking tape? Change it! You can use coloring pencils, koki's, markers, acrylic paint, craft paint, etc. I decided to use watercolours on mine. Drop a blob of watercolor on the tape.
Use a brush to spread the paint out evenly, or even unevenly if you prefer. You may also want to experiment with different colours or shading. I leave the paint to dry while I continue with another strip.
This time I use a Sharpie marker and a tearing ruler to draw a curved line on the tape.
I then use a stencil to add some dots to the design.
By adding only one more colour, I managed to create a very interesting pattern and a very pretty length of Washi Tape. Now, imagine using your extensive range of markers, pencils and pens on the tape and you will understand when I say that the possibilities are endless.
But how about adding stamping to the tape? I use some Distress Ink, stamps and a stamping block for the remaining tape.
Ink the stamp and press down on the tape.
Repeat the pattern as often as necessary. You can even alternate it with other patterns.
Pretty, isn't it?
The glue should by this time be dry enough to lift. I do so, making sure my other 'tapes' do not get permanently stuck to the cardboard.
I still need to return to the painted masking tape. This one will also be stamped, but I choose a different ink colour.
By making your own stamps, you can personalize the tape even more by adding names, dates, etc to the tape.
Paper Tape
Now it gets really exciting! You can use the paper roll from a cash register to create long stretches of tape, making it as wide, or as narrow as you please.
I want to work on a narrower stretch of paper, and trim mine accordingly.
At this stage it is hardly necessary for me to point out that you can add colour to the paper. I skip that and simply punch a repetitive pattern in the paper strip.
How easy is that!? Mount this paper on a coloured paper background, and you have an even prettier finish.
I had a stretch of purple cardboard without any writing and I stuck my paper to this. Cardboard is not ideal as it is very stiff, but you will be able to see better what I mean.
This is a cute collection of tapes created in a very short time. But allow me to leave you with even more ideas. How about printing strips of paper from the computer and then cutting it apart and putting some double-sided tape on the back? Use a colour printer and a design programme and you do not have to restrict your printing to words. Or perhaps you have a really pretty design that you could decoupage onto paper/fabric before turning it into tape?
For more crafty ideas and great products, visit APrettyTalent.com.
Remember to keep nurturing your TALENT for making PRETTY things.
You can subscribe to this blog and receive regular updates by email by simply registering your email address at the top of the current blog.


No comments:
Post a Comment