Do you love thick layers of paint with loads of texture and body? Normally this is associated with oil colours, but I will show you how to turn your acrylic paintings into thick impasto works of art as well. I make a quick art journaling page in today's blog to illustrate the technique, but the same thing can be done on canvas as well.
I start on a plain white 12" x 12" paper of 80 gsm, equal in weight to the average printing paper. This paper is treated to a coat of gesso. Once the gesso is dry, you can even use oil colours on it. I have done a blog on this before. Today we will be using acrylic colours.
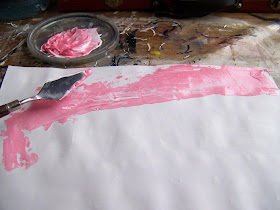
Once the gesso is dry (which should be almost instantly), I mix red and white acrylic paint to give me a rich pink. I always mix my paints with a palette knife.
I use the palette knife to paint an uneven layer of paint on the paper, wanting the final product to have a rough looking appearance.
I then add a bit of yellow to the mixed paint so that I could achieve an orange tint in the paint.
I also mix a generous amount of Acrylic Textured Paste (Impasto Medium) to the paint.
Mine has started to dry a little and so I use a dripper to add the tiniest amount of water to the paint.
I find a stencil of my liking and place it on top of the paper as soon as the paint is dry.
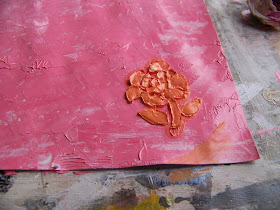
I use the palette knife to lather the impasto medium onto the stencil, making sure it fills all of the grooves and holes of the stencil.
Then I carefully lift the stencil away.
I do a second pattern in the same way. This close-up shot shows the thickness of the paint clearly.
I do two rows of these alternating patterns. Then I clean my palette knife on the page, covering the rest of the page in hues of sunsets.
Once the paint is dry, I get myself some FW Acrylic Ink, and a dip pen.
I draw a figure with flowing lines on the paint with the pen and ink.
Next I grab a stamp pad, stamps and a stamp mount.
Having done some subtle stamping, I use a Faber-Castell Pitt Artist Pen to add some journaling to the page.
I then add some craft glue to the page.
I sprinkle a generous amount of sequins onto the glue. I will later regret this and remove it.
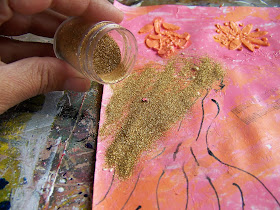
I like the fine tip on the Tombow glue and use this to draw some lines with glue in the figures hair.
This is sprinkled with fine gold dust.
The skirt is also drawn with glue lines and sprinkled with mother of pearl dust.
Having shaken off the excess glitter, I sit back and realize how much I hate the star-shaped glitter.
I use a palette knife to loosen the paint and remove most of the glitter.
I will rather build some fabric flowers and add those to the layout.
I compile the flowers I want to add.
I use an awl to pierce holes in the page and fasten the flowers to it with split pins. Now I am satisfied with the finished product.
For more crafty ideas and great products, visit APrettyTalent.com.
Remember to keep nurturing your TALENT for making PRETTY things.
You can subscribe to this blog and receive regular updates by email by simply registering your email address at the top of the current blog.


No comments:
Post a Comment