Measuring, planning and cutting
I start by cutting the flaps off the boxes. I use a craft knife to cut along the inside of the box, right on the fold.
I then turn the box over and cut on the outside as well.
That should be all that is required to remove the flaps neatly.
I do this with all three boxes.
I then had to decide on a color scheme for the boxes. I used six different fabrics on my boxes, but you can do whatever is convenient for your purposes.
I took all of my measurements on the inside of the box. I measure the height of the boxes.
Also the length.
And the width.
I draw a little diagram for myself where I jot down the measurements.
I then calculate what lengths of fabric I will need to cut. Calculate it like this. Cut one length to measure the (length of the box + 3 cm seam allowance) by (2 x the height of the box + 1 x the width of the box + 3 cm seam allowance). You also need to cut two side panels, each measuring (the height of the box + 3 cm seam allowance) by (the width of the box + 3 cm seam allowance). Add half a cm to the measurements for the outside of the box.
The fabric was cut according to the above measurements and laid inside the box to keep track of where they went.
This was the inside of the box done. I now moved to the outside of the box, adding the 0,5 cm to the measurements to accommodate the thickness of the actual box.
The fabric was once again measured accurately with a ruler and dressmaker's chalk before it was cut.
I again pinned all the pieces in place to keep track of them.
These steps were repeated with all three boxes. It certainly helped that all of my boxes had the same measurements!
Sewing the boxes
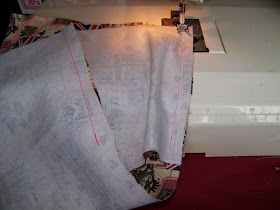
Lay the side panel (height of the box) along the long end of the center panel. Sew, leaving 1,5 cm unsewn at the inner end.
Fold the fabric over and on the other end of the center panel, lay the same side panel (again height of the box) along the same side of the center panel and sew. Remember to leave the 1,5 cm end unsewn.
Make two short snips at the 1,5 cm openings. Fold the side panel's remaining end to fit on top if the remaining open stretch of the center panel.
Sew this seam from 1,5 cm opening to 1,5 cm opening.
The first half of the box should now be taking shape. Do the same to the other side panel, repeating the steps above.
The inside lining of the box is now complete and you can insert it into the box.
Repeat the same steps as above for the outside of the box. Lay the side panel (height of the box) along the long end of the center panel. Sew, leaving 1,5 cm unsewn at the inner end.
Fold the fabric over and on the other end of the center panel, lay the same side panel (again height of the box) along the same side of the center panel and sew. Remember to leave the 1,5 cm end unsewn.
Make two short snips at the 1,5 cm openings. Fold the side panel's remaining end to fit on top if the remaining open stretch of the center panel.
Sew this seam from 1,5 cm opening to 1,5 cm opening.
The first half of the box should now be taking shape. Do the same to the other side panel, repeating the steps above.
The outside lining of the box is now complete.
Turn the outside lining right side out.
Insert the box into the lining. It should be a tight squeeze.
Fold the ends of the linings in and pin in place.
Sew the top closed by hand. This is the tidiest way of doing it.
Hmmm, okay, on second thought, maybe I'll just keep these for myself!
For more crafty ideas and great products, visit APrettyTalent.com.
Remember to keep nurturing your TALENT for making PRETTY things.
You can subscribe to this blog and receive regular updates by email by simply registering your email address at the top of the current blog.


No comments:
Post a Comment