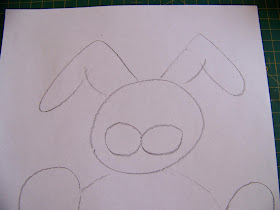
One of the shapes used in drawing, more often than any other, is the circle. That is why I like to start kids learning to draw with circles. In today's blog I show you step by step how to draw a very simple rabbit using basically only circles. Afterwards, we have loads of fun coloring and decorating it. This is a great blog to help build confidence in young new artists.
Start on the body of the rabbit by drawing a large circle filling the bottom half of the page.
Now draw a smaller circle filling half of the top of the page.
If you are looking at the rabbit from the back, then you need to draw a circle as big as the head inside the body to represent the tail.
Two almost semi-circles protruding from the bottom of the body, will serve as feet.
Draw half a heart on each side of the body to serve as arms.
I did not think the rabbit needed hands, but my 3-year old niece insisted. So I added some scollops below the arms to serve as hands.
Draw the ears in 3 steps. Start by putting some angled lines on top of the head.
Add a line that forms a u-turn to the first lines.
Finish the ears with curved lines running from the head and meeting at the top.
You have now drawn a pretty descent rabbit that is easy enough for the kids to follow step by step with you.
If they insist on seeing the rabbit from the front, you should not draw the tail. Instead, draw the facial features in the head. Draw two circles in the bottom half of the face for the mouth area.
Draw a circle on top of the first two circles for the nose.
Draw a square directly below the first two circles for the teeth and draw a line through it to turn it into two teeth.
Draw two semicircles on top of the first two circles for the eyes.
Draw two quarter circles in each eye for the pupil and color of the eyes.
Lastly, draw the whiskers in on the sides.
It is time to get some coloring pencils to add color to the rabbits.
The 9 year old niece has discovered that retaining white is a useful art element and this is something that features strongly in her art these days.
The 3-year old could not see why her rabbit could not have both a tail and a face and I conceded.
Adding elements like glitter and cotton wool to the pictures makes the whole project so much more fun for everyone involved.
Here is the proud 3-year old with her masterpiece.
Here is the quick one I did in between helping the younger artist. It is important to make your own when working with kids. This way they have an example to refer to and you do not work on their papers!
This is the 9-year old's completed project.
Have fun. Remember that kids can not learn from books/websites. It is important that you show them step by step what to do. Simply printing the steps and leaving them with the printouts is no guarantee for success or fun.
For more crafty ideas and great products, visit APrettyTalent.com.
Remember to keep nurturing your TALENT for making PRETTY things.
You can subscribe to this blog and receive regular updates by email by simply registering your email address at the top of the current blog.


No comments:
Post a Comment