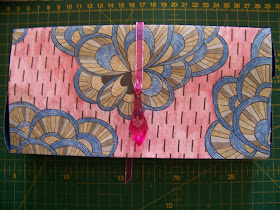
I love giving special handmade gifts for Christmas and this Christmas I intend to put these special gifts in handmade boxes and bags as well. I have been showing you how to turn your coloring pages into cute gift bags and boxes, but you can also use any decorative paper to achieve similar results. I will once again use one of my colored pages in today's project and turn it into a decorative sliding box.
I broke away from my normal palette when I colored this page in Derwent's Metallic pencils. You can use any coloring page from the wide selection of adult coloring books available on the market these days.
As these pencils are watercolor pencils and can be used wet or dry, I decided that I would paint the background with water once colored. The pictures were not painted. I used a Pentel Aquash Brush for this purpose, absolutely loving the water reservoir in the handle.
I turned my page over and marked 3 cm off on the sides. I found the center of the page and measured 1,5 cm to each side of the center. This meant that my box would measure 10,5 cm in width and 21 cm in length. The height would be 3 cm.
The next step was to find a coordinating piece of paper/cardboard. This was cropped to measure 16,5 cm x 27 cm. I used a cutting mat, craft knife and metal ruler to ensure precision cutting.
I measured 3 cm all around the cropped page.
The corners were marked 1 cm down and 0,5 cm in, so as to trim the flaps.
I then cropped the corners on the flaps and cut them loose so they could fold over. Then I proceeded to fold along the fold lines. I prefer using a ruler when folding as this makes it easier to achieve neat and straight fold lines.
I put double-sided tape on the flaps in the corners.
I then set my compass to radius 1,5 cm.
I found the center of one of the shorter sides of the paper.
Centering the compass on the center mark, I described a semi-circle.
I cut the semi-circle out with a pair of scissors. This would make a thumb hold that would make it easy to slide the box in and out.
All that was left to do to the inside of the box was to fold the sides in and to secure them in place with the double-sided tape already in place.
Turning my attention back to the colored page, I folded this paper over a ruler along the fold lines as well.
I put double-sided tape along one side of the paper.
The page was then folded over and secured in place with the double-sided tape.
I slid the inside into the outside of the box. I do not decorate the box further until I have settled on a recipient, but I will share some ideas with you that I will simply lay on the box. Once the recipient and occasion is settled, I will secure my final choice for decorations with Tombow glue.
You can use any of a great selection of embellishments to decorate the boxes in this series. Here I used two rubber hearts.
Another idea is to add some felt flowers.
How about combining some fabric embellishments with a spot of bling?
Button and wire embellishments open new avenues.
Perhaps you want to be more linear in the layout?
You might even choose to simply tie a pretty ribbon around the box. The possibilities are endless.
For more crafty ideas and great products, visit APrettyTalent.com.
Remember to keep nurturing your TALENT for making PRETTY things.
You can subscribe to this blog and receive regular updates by email by simply registering your email address at the top of the current blog.


No comments:
Post a Comment