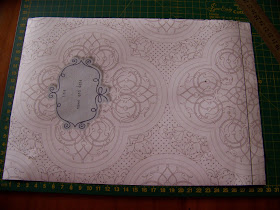
I tore this page from a coloring book for adults and then colored it with Derwent Coloursoft Pencils. I decided that it was too pretty to leave hidden away and decided to turn it into a gift box.
I started by marking the fold line on the right at 28 cm on the cutting mat.
I now divided the 28 cm in half at the 14 cm mark.
I measured the fold lines 3 cm in from the top and bottom.
I set my compass to 10 cm radius to construct the curves.
I drew the curves at the tops and bottoms.
I positioned the center line in line with the guidelines on the cutting mat. I then positioned the compass outside the page to construct the fold lines with the compass. This is still at radius 10 cm.
This is what the pattern looks like with the curves in place.
I now set the compass to radius 1 cm.
I constructed the index curves at radius 1 cm.
I now came time to cut out the pattern.
The straight fold lines were folded over a ruler.
I used an embossing tool to score along the curved fold lines.
The flap received double-sided tape along its whole length. I stuck it on the right side as I would be tucking this flap in.
Fold the gift along the length.
Tuck in the top and bottom. This is easy if you have scored the curved fold lines. You can glue the bottom down if you prefer. I will leave mine open until I am ready to fill it.
For more crafty ideas and great products, visit APrettyTalent.com.
Remember to keep nurturing your TALENT for making PRETTY things.
You can subscribe to this blog and receive regular updates by email by simply registering your email address at the top of the current blog.


No comments:
Post a Comment