Today I will show you how to draw a giraffe step by step. We will then color the giraffe using Derwent's Drawing pencils, a series specially designed to draw fur and landscapes. It is amazing how easy it is to set the right tone with these pencils. Let me walk you through the process step by step.
You will need a drawing pad. I prefer to tear a page out of the pad and to stick it down on a masonite board with masking tape. This way I prevent the pages behind the one I'm working on in the pad from getting damaged. I will be using Marie's Jumbo clutch pencil with the 4B lead to draw the giraffe. I well then color it with Derwent Drawing pencils.
I find an outline of a giraffe on my iPad. These are photos I copied here from a DVD by Andre Grobler. I find this a very nice collection for reference photos.
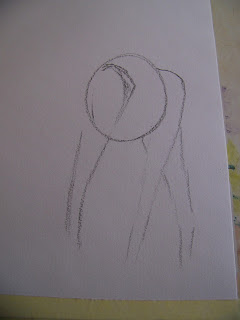
I start by making a huge circle for the body of the giraffe.
The hind legs are drawn in place.
The front leg closest to me is added.
I add the other front leg and notice that I will need to adjust the lines.
An eraser helps me to quickly make the necessary changes.
The neck is added.
Time to add the head. Yep, you're right, the neck ought to have been longer.
I shape the pencil on sanding paper before I add detail.
I start with the detail on the head.
I move down to the legs. I like to work from the top left to the bottom right, because I am right handed. This reduces the risk of smudges since I am not working over the drawing.
The rest of the detail is added.
I use the Chocolate pencil from the Derwent Drawing set to color the darkest colors on the giraffe.
I use a blend of wheat and Sanguine on the head and neck to fill the spaces between the spots.
I continue this throughout the giraffe.
I use Ivory black to write my name. Olive earth is used to add the first grasses.
Light Sienna is added to the Olive Earth.
Warm Earth is added to the grasses and the foreground.
Mars Orange is now added to the grasses and the foreground.
Finally Smoke Blue is added to the background.
All that is left to do is to remove the masking tape.
All done!
For more crafty ideas and great products, visit APrettyTalent.com.
Remember to keep nurturing your TALENT for making PRETTY things.
You can subscribe to this blog and receive regular updates by email by simply registering your email address at the top of the current blog.


No comments:
Post a Comment