In the previous two blogs we have spent a lot of time baking and preparing the cakes that would form the base for Paw Patrol themed party. Today I will show you a little bit about decorating the cake. This is very entry level fondant work that anyone can do.
The first thing to do is to mix the icing for the cake. If you do not put icing under the fondant, it could dry out and crack. It could also slip off your cake, depending on the design. I use about 100 g margarine/butter.
Cream the margarine with a blender.
Sieve 4 cups of Icing Sugar (4 x 250 ml). Add it to the margarine and mix. If possible, close the bowl to prevent dust clouds.
The mix will be very crumbly. Add a teaspoonful of vanilla essence (5 ml).
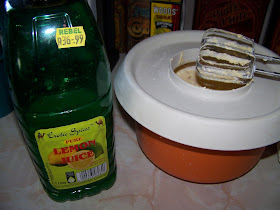
I prefer to add a teaspoonful (5 ml) of lemon juice since it breaks the sweetness of the icing ever so much. This is optional.
Add 50 ml milk and beat well.
If you do not have a nice soft spreadable icing, add a little bit more milk. (I advise you add it 1 teaspoonful at a time so as to prevent getting a soggy mix).
I want half the icing to be brown and therefore I add 50 ml cocoa powder to a bowl.
I scoop half the icing sugar onto the cocoa powder and mix it with the electric beater. The brown icing was used on the Paw-Print cupcakes from two days ago.
We are now going to start decorating our cake. The bottom of the tower is smaller than the roof at the top and I use a bread knife to cut the sides of the cake away.
Both cakes are then 'dirty iced' with the white icing.
Roll out your blue icing with a cake pin. You need to make it much larger than the cake it needs to cover, or you will struggle to get it smooth over the sides.
Use a pizza cutter to cut away the excess fondant.
I rolled out a lighter shade of blue fondant. (Actually I simply used purple which I had on hand, since this cake was not on order).
Use a metal ruler to measure 2cm wide strips. Cut along the ruler with a pizza cutter.
Cut the strips into 2 cm x 2 cm squares.
Put some icing on the backs of the squares to stick them to the fondant.
Space the windows of the tower evenly all the way around the tower.
I did not have enough red fondant for the roof and needed to mix this color. Take a scoop of white fondant. You can use any type of coloring to color the fondant with. Here I show you three types.
Flatten the fondant and add the coloring. I like to use the powder and the gel together. The gel tends to make the fondant too sticky, while the powder tends to dry it out. Using the two together balances this out. Fold the fondant over the coloring and knead by hand. Your hands WILL get dirty.
Mixing it halfway through creates a nice marbled effect.
I needed a solid red and kept kneading. I then rolled it out on a silicone mat. If you work on a table top, you will need to sprinkle icing on the surface to prevent the fondant sticking to the table.
The second cake is decorated much the same as the first.
Make a nice thick yellow worm from fondant. Bend it and put it on the cake. Stick half a kebab stick trough it to keep it in place.
I am not a sculptor, but I did try my hand at these figurines for only four of the cupcakes, since I wanted to use them as decorations for the bog cake. This is pretty much the same thing you did when playing with clay as a child. If it doesn't work, throw it back and start again. No harm done.
I covered a bottle with blue paper. I then cut a circle from yellow paper, cutting it open at one end and attaching it as the slide. All that was left to do was to balance the cake on the bottle and to arrange the figurine cupcakes around the bottle. Very easy cake decorating project. Share yours when you've tried it.
For more crafty ideas and great products, visit APrettyTalent.com.
Remember to keep nurturing your TALENT for making PRETTY things.
You can subscribe to this blog and receive regular updates by email by simply registering your email address at the top of the current blog.


No comments:
Post a Comment