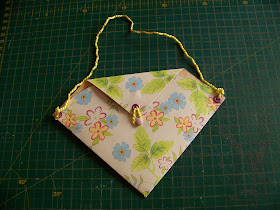
When we were making the bookmarks in a previous blog my niece turned it upside down and casually mentioned that if it were bigger, we could make handbags out of it. Well, her aunt like the idea and the next holiday project was born on the spot. Let me show you how to make these cute and easy paper handbags.
I start with a sheet of double-sided craft paper. I use my craft knife and metal ruler to crop this to 14 cm.
I then cut two squares. One square measures 14 x 14 cm and the other is 13 x 13 cm.
I use my bone tool to score a fold line of 1 cm on two adjacent sides on the larger square.
I fold the cardboard over the ruler to get an even fold.
I want the folded sides to be on the inside of the bag and stick the double-sided tape right on the edges of two of the sides of the smaller square.
I lay the smaller square very carefully on the folds of the bigger square. My niece, who was making her own bag figured this was too difficult to do and opted to let the folds fold over on the outside. I did not pressure her, but allowed her to do what she felt comfortable with.
The inside of the bag. Can you see the folds?
I am now going to cut the front of the bag shorter so the back can fold over to close the bag. I slide a smaller cutting mat right into the bag so that I won't cut into the back.
I set a compass to 13 cm, the width of the bag, and score a curve from one corner of the bag to the other.
I use my craft knife to cut out the curve free-hand. If this is daunting, allow the child to cut the curve with a pair of scissors. I had to start the curve for my niece and then allowed her to cut the rest herself using the scissors.
I score a fold line for the flap of the bag.
I again use the ruler to make a neat fold on the line that I've scored. This is merely an indent in the paper that makes it easier for me to fold it.
I am now going to set eyelets to attach the string handle of the bag. I use a cutting mat that I use specifically for this purpose to spare my other cutting mats as this exercise tends to leave indents in the cutting board. You will need eyelets, an eyelet setter and a small hammer.
Position the eyelet under the paper.
Pressing down on top of the eyelet with your finger will make a round indent on the paper showing you clearly where the eyelet is. Position the eyelet setter on top of the eyelet on the 'wrong' side of the paper.
Lightly tap the back of the eyelet setter with the hammer. I am doing a precarious balancing trick here so my free hand can work the camera.
For the purposes of the bag, I set a second eyelet on top of the first on the other side of the bag. I do not recommend this if you are not familiar with setting eyelets as this is a little tricky to achieve without popping the first eyelet off.
I slide my small cutting mat into the bag again. This time I make a tiny slit in the paper where I want the split pin to go for the fastening of the bag. This will make it much easier to push the split pin through the thick cardboard I am working with.
I seem to have neglected taking a photo of where I've pushed the split pin through the paper. This will have to satisfy you until a later photo where you can see it.
I cut a piece of string for the handle.
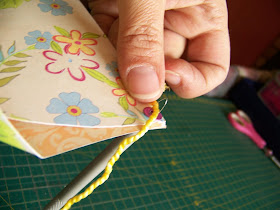
I am going to use the hook tool to pull the string through the eyelets.
Push the hook tool through the eyelet. Then push the string through the hook.
Now pull he hook tool out again and it will pull the string through the hole along with it.
Secure the string with knots.
Here jou can see both the split pin fastening as well as the string handle.
I cut a small triangle from my off-cuts.
I set another eyelet in the center of the flap. I pull a short piece of string through this eyelet, allowing it to form a loop.
The inside of the flap.
I glue the string down with Tombow Glue.
I glue the small triangle that I've cut as well.
The triangle covers the ugly strings on the inside of the bag.
I test and find that the fastening works perfectly.
Now for the decorations. This is where the fun starts all out! I decide to use some ribbon on the edges.
I again use the Tombow glue to secure the ribbon in place.
I like this, but I would like to do more.
I go back to my off-cuts and cut out the little flowers.
I use double-sided 3D squares to secure the flowers to the bag.
Don't worry if the flowers don't fit exactly. Working outside the lines adds a fun factor to the bag.
I don't have enough flowers left in my off-cuts to finish decorating the back of the bag. I therefore punch a butterfly from the off-cuts and stick this on instead.
The finished product.
My niece hard at work decorating her own bag.
She opted to make a much larger bag and is very proud of her handiwork.
The tiny niece was given my bag since she is not quite old enough to attempt this project. She walked around with her bag the whole afternoon without putting it down. It warms an Aunt's heart.
For more crafty ideas and great products, visit APrettyTalent.com.
Remember to keep nurturing your TALENT for making PRETTY things.
You can subscribe to this blog and receive regular updates by email by simply registering your email address at the top of the current blog.


No comments:
Post a Comment