Marie's set of drawing materials consists of the following:
- Craft knife with which to sharpen pencils;
- Putty Eraser;
- Soft eraser (brilliant!);
- Two pencil extenders for when the stubs becomes clumsy to hold because they are too short;
- Paper stump to blend with;
- 2B and 4B pencil;
- 2 charcoal pencils;
- Black charcoal bar;
- Brown pastel bar.
In the photo I show you what it looks like when you buy it new. I have also unpacked my own set for you to see. I pressed a short pencil into the pencil extender for effect. You will also need a drawing pad to draw on.
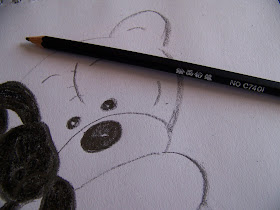
I use the 2B pencil to draw the picture on the paper. These cute Tatty Teddies is not my brainchild and I do not know who to credit with its origin, but I love drawing these simple little pictures for quick studies.
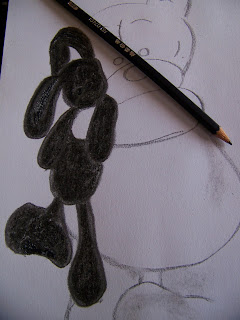
I use a charcoal pencil to color the darkest parts of the bunny's ears and feet.
I then use the charcoal bar to color the rest of the bunny. I conclude that I would have liked greater variation in color here.
The bunny is then blended using the paper stump. This is very compact and great quality.
You can not use charcoal over pencil, for it will not take on the slippery surface of the graphite. You can however use pencil over charcoal which is much more coarse and can even be dusted away. I make use of this knowledge to use one of the pencils to redefine the bunny. The results are dubiously successful. A white pastel pencil would have been a much better idea, as Derwent includes in the charcoal pencil sets they produce.
I use the 4B pencil to color the bear's eyes and nose. Remember to reatain the white spots for the reflections of light in these areas.
The paper stump is as effective for blending the pencil as the charcoal.
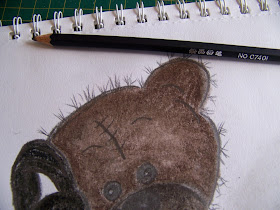
The bear's body is colored using the brown pastel bar.
A tinge of black is added to the snout using the charcoal bar.
The bear is then blended with the paper stump.
The defining lines are redrawn in pencil. I do the patch at the same time.
The pencils are also used to draw clumps of hair.
I signed my name with the charcoal bar to show you the level of accuracy that can be achieved with these bars. If I were to sharpen the end into a point first, I would be able to achieve even greater success here.
Soft pencil, charcoal and pastel can be fixed with a fixative spray to prevent it from smudging.
The final product allowed me to reach surprising lengths and I am pleasantly surprised. I believe if I were just starting out, I may not have missed anything. As it is, I am used to a greater variety of mediums and graphite tones and I missed the option of adding more nuances. What I can say in favor of this set is that it is remarkably easy to achieve very dark blacks. I certainly recommend the set to established artists for precisely this reason. There is no need to saturate your paper to achieve a dark black, with these naturally dark products.
For more crafty ideas and great products, visit APrettyTalent.com.
Remember to keep nurturing your TALENT for making PRETTY things.
You can subscribe to this blog and receive regular updates by email by simply registering your email address at the top of the current blog.


No comments:
Post a Comment