Distressing and inking the backdrop
Use a fine sand block or sand paper to distress the backdrop. As you rub the sanding block over the paper, the white will show through. Guard against being obsessive; a little white is enough.
Work at the edges. We want to distress these quite a bit.
This is what the backdrop looks like when I am done distressing it.
I am now going to cover most of those ghastly white spots with Tim Holtz's Distress Ink in Walnut Stain.
I start on the edges, rubbing the ink pad over them.
I deliberately smear the ink into the paper, not restricting it to the utter edges.
When I am done with the edges, I move the inside of the backdrop and lightly smear the ink all over the surface.
Again, I want to urge you to guard against being obsessive. We want to age the backdrop, not make it look like it is in need of a thorough cleaning!
Stamping the backdrop
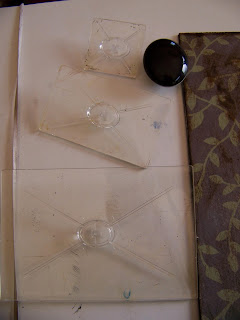
I am going to use unmounted gel stamps. The stamp block comes with three differently sized mounting blocks. Choose the one that best fits the size of the stamp you attach to it to ensure best results in positioning and stamp quality.
Gel stamps usually come in sets. Simply pull them off their protective plastic and lay them on the stamp block.
The gel stamp will automatically stick to the mounting block and will stay secure until you remove it again.
The handle of the stamp block simply slides into the back of the stamp mount.
I am going to be using three different colors Distress Ink in my project; Walnut Stain, Pine Needles and Faded Jeans.
Ink the stamp well.
Position the stamp on the surface, press down and lift away. DO NOT WIGGLE THE STAMP as this will result in blurred double lines.
Clean the stamp with a damp cloth or sponge when done. Do not allow the ink to dry on the stamp.
The blue and green ink leaves definite images while the Walnut Stain is more subtle. It is often a good idea to have a mix like this when stamping.
When I am done, I seal the backdrop with a coat of Modge Podge. The Modge Podge smears the ink from the stamps a little. Waiting longer to apply the Modge Podge will be beneficial to avoid this. Fortunately my coasters will cover this up and it won't be a huge bother in my project.
Distressing and inking the coasters
I am basically going to give the coasters the same treatment as the backdrop. I distress the three coasters that have been decoupaged.
I once more concentrate on the edges, distressing these with vigor.
I now follow the same procedure in staining the coasters with Distress Ink, again focusing largely, but not solely, on the edges.
When I am done, I seal the coasters with a coating of Modge Podge.
I now turn my attention to the six remaining coasters that have only been painted thus far. These are going to be inked in the same way as the decoupaged three.
When all of the coasters have been prepared, I juggle them around on the backdrop until I am satisfied with the layout. I stick them down with wood glue.
Jounaling
I have often mentioned my infatuation with Faber-Castell's Pitt Pens. Small wonder then that I once again turn to these pens to add the journaling to the project.
I decide to go over the journaling a second time, this time choosing to use the Sepia Brush Pen by Pigma, another firm favorite. This gives my journaling an automatic play of light and shadow.
Stamping the final touches
I want to emphasize the word 'heart' in the journaling and choose to do so by stamping a clear green heart in the final coaster, almost like a full stop or exclamation mark to the statement.
I then randomly add more stamps to the rest of the coasters in the three previously mentioned colors.
With that the project is finished and I revel in another project that turned out as I imagined.
For more crafty ideas and great products, visit APrettyTalent.com.
Remember to keep nurturing your TALENT for making PRETTY things.
You can subscribe to this blog and receive regular updates by email by simply registering your email address at the top of the current blog.


No comments:
Post a Comment