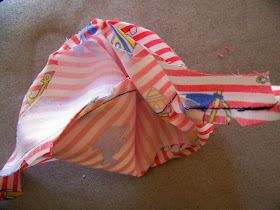
Did you have as much fun as I did making the cap last time? When I gave the cap to my little nephew to fit, before it had the lid on, he announced that he wanted it that way. I told him I'd make the next one like that. After all, it was already an existing version on the pattern. The patterns can be downloaded from APrettyTalent.com here. Here is a summary of the blogs:
Part 1 - Conceptualization
Part 2 - Design the basic pattern
Part 3 - Variation: design a round beret
Part 4 - Variation: design a flower beret
Part 5 - Constructing the flat top cap
Part 6 - Variation: sew an open cap
Part 7 - Variation: sew a round beret
Part 8 - Variation: sew a flower beret
Pattern Layout
Let's start by laying the pattern out on the fabric. I cut two inserts to strengthen the cap from denim.
The headband was also cut from denim. I did not want to use the wide band again. This is why I used the narrower band, but added 1,5 cm seam allowance so I would not loose width.
The fabric I used had a very definite line pattern. I could therefore not lay my pattern out sparingly, but had to consider the lines more than saving fabric.
I cut vilene stiffening for all the necessary pieces, i.e. the headband, the cap inserts and the cap itself.
Iron the vilene on to the fabric.
Constructing the Cap
I like to start with the cap and once again I started by sewing the inserts of the cap together with random zigzag stitching.
I then put the two cap pieces right sides facing on top of each other and sew the outer edge at 1,5 cm seam allowance.
I cut notches in the seam allowance to make it easier to turn the cap right side out and trim the excess fabric.
I then turn the cap right side out and iron it flat.
It is now time to insert the inner to strengthen the cap.
Attach the cap to the headband
Attaching the cap to the headband is really all that is left to do. Find the centre of the cap and attach it to the centre of the headband.
Pin the sides down and sew the cap onto the headband at 1,5 cm seam allowance.
Bring the two ends of the headband together right sides facing and sew with a 1,5 cm seam allowance.
Iron this seam open.
Fold the headband down the middle in its length and iron it flat.
Fold the open ends of the headband in and pin them in place.
What I normally do is to sew this by hand, but I want to show you another option (which I like less). It is also possible to close the headband with top-stitching. Make your stitch length a little longer when you do top-stitching, because it will look neater.
Work as close to the edge as possible. I changed my needle position to right to get even closer to the edge.
This is what the seam looks like with top-stitching. Sewing by hand will always give you a much tidier finish.
Personally, I don't like top-stitching only one side of the headband. That it why I went back and top-stitched the top of the headband as well.
I then decided to carry this through and made a top-stitch on the cap as well.
In the next blog I will show you how to make
the round beret with a cap.
For more crafty ideas and great products, visit APrettyTalent.com.
Remember to keep nurturing your TALENT for
making PRETTY things.
You can subscribe to this blog and receive
regular updates by email by simply registering your email address at the top of
the current blog.


No comments:
Post a Comment