Today I will show you how to bake one of my Dad's favorites. When I do not have time, I will bake these with store-bought puff pastry, but they really are incredibly good when you bake them with a Rough Puff Pastry. I show you step by step how to make this tricky pastry before we make the jam tartlets. I also had some store-bought puff pastry left over from another dish and turned this into jam tartlets as well so you can compare the appearance, if not the taste.
I used the recipe from a recipe book that is familiar to most Afrikaans-speaking South Africans, namely the Kook en Geniet (Cook & Enjoy).
I start by grating 250 g ice cold butter. Put it back in the fridge and keep it very cold.
I the sieve 250 g cake flour (approximately 2 cups or 500 ml) and 1/2 teaspoon (2,5 ml) salt.
And then I sieve it again!
I then rub a dessertspoonful of butter into the flour mixture with the tips of my fingers.
A little helper pitched up at this stage and she mixed 150 ml ice cold water (very important!) with 10 ml brandy. You can substitute the brandy for the juice of one lemon, or the yolk of one egg.
Add the liquids to the flour mixture and cut with a knife to mix. Put it in the fridge for about two hours to cool.
Once cooled, you can work the dough into an elastic ball.
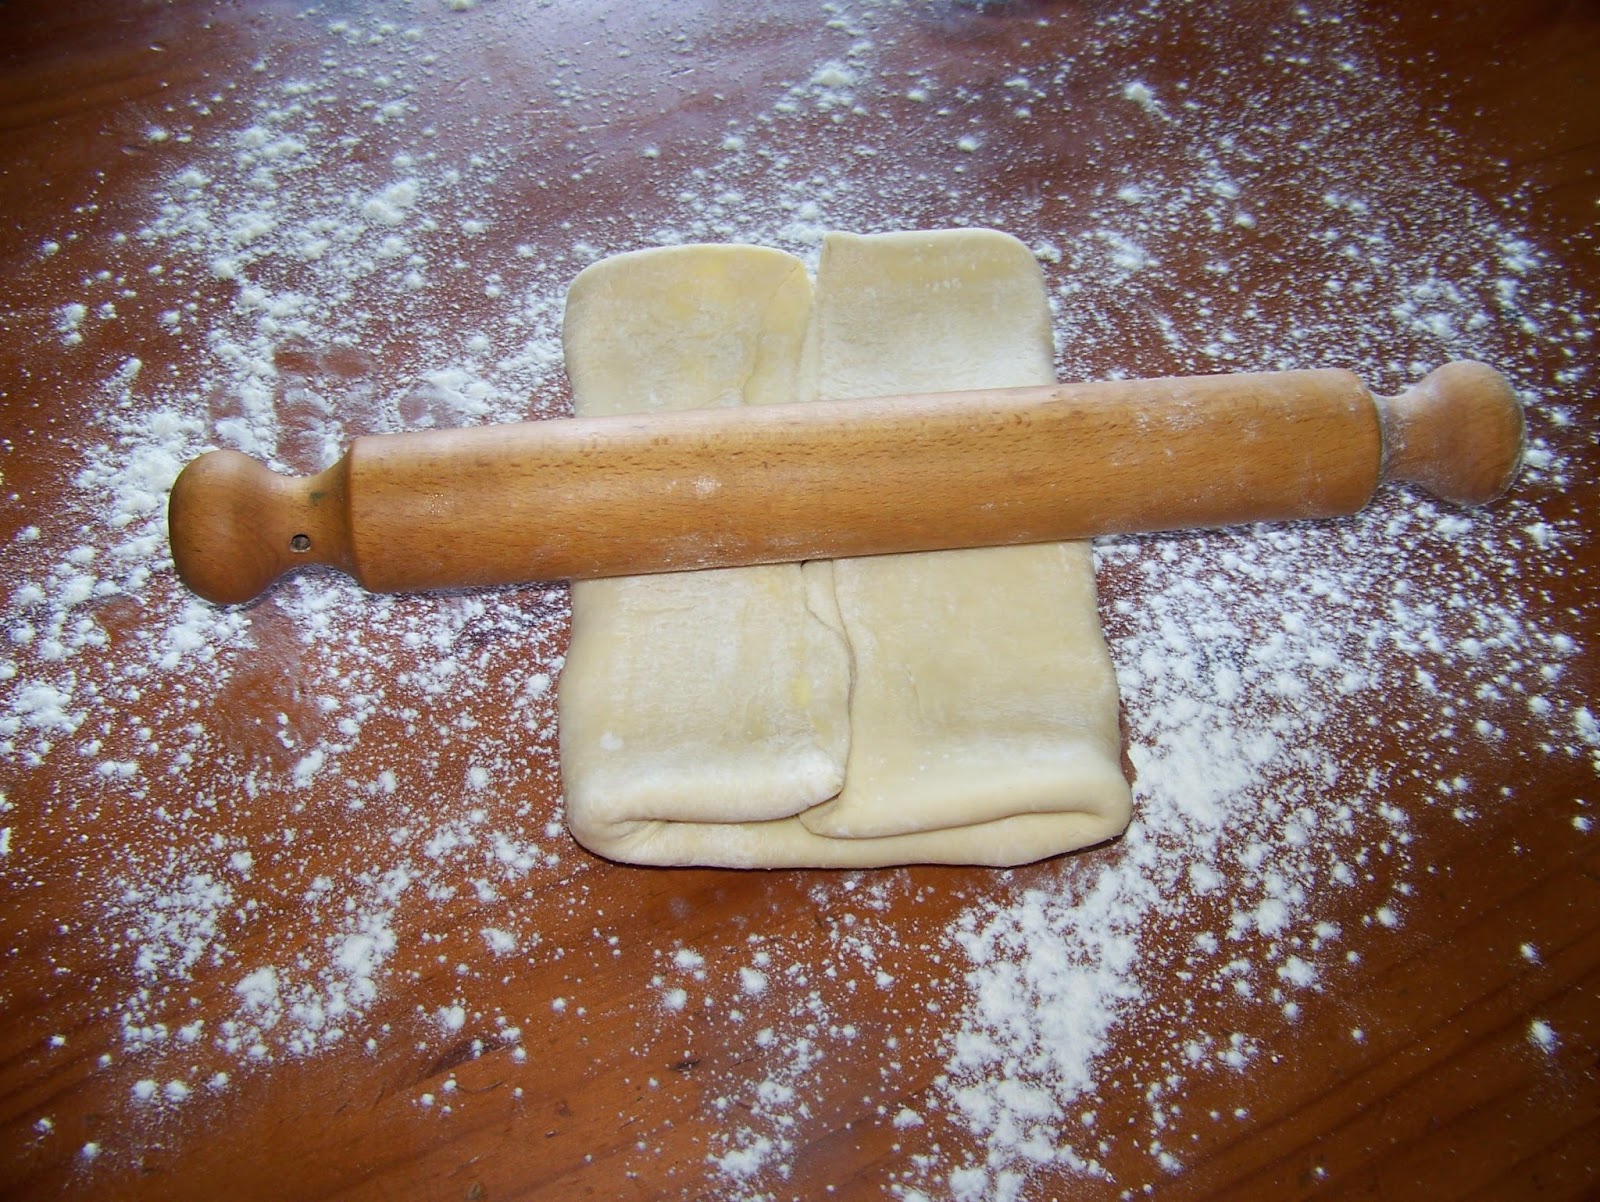
Roll the dough out into a rectangle.
Sprinkle 1/3 of your grated butter over the dough. The temperature rocketed above 30 °C on the day I was making this and the butter melted almost as soon as it landed on the dough. It is impossible to make a rough puff pastry in such hot weather. I had to let it stand over until a much cooler day. But first ...
I folded the pastry over from the sides to meet in the middle
Then I folded it in from the sides again.
I then sealed the sides with my roller and put both the pastry and the leftover butter back in the fridge to wait for a cooler day.
Two days later the temperature had cooled sufficiently for me to carry on working on the dough. I rolled the ice colds dough out into another rectangle.
I then once again sprinkled another third of the grated butter on top.
The dough was once again folded in from the sides.
And folded in from the sides once more. The dough and leftover butter was returned to the fridge for another hour.
The ice cold dough was then removed from the fridge and once again rolled out into a rectangle.
The last of the grated butter was sprinkled over the dough.
The sides were folded in ...
... and folded in once more. The dough went back in to the fridge for another 30 minutes.
Once again the ice cold dough was rolled out.
I then used a round cookie cutter to cut circles from the dough. The off-cuts were rolled into a ball and returned to the fridge for 15 minutes. It was then rolled out again and cut out again. This process was repeated until all of the dough was used up. It is extremely important to keep the dough cold. In Winter time you will find the dough much easier to work with. (The cut circles also waited in the fridge with the rest of the dough until everything was ready for use).
I dropped a dollop of apricot jam in the center of each cutout.
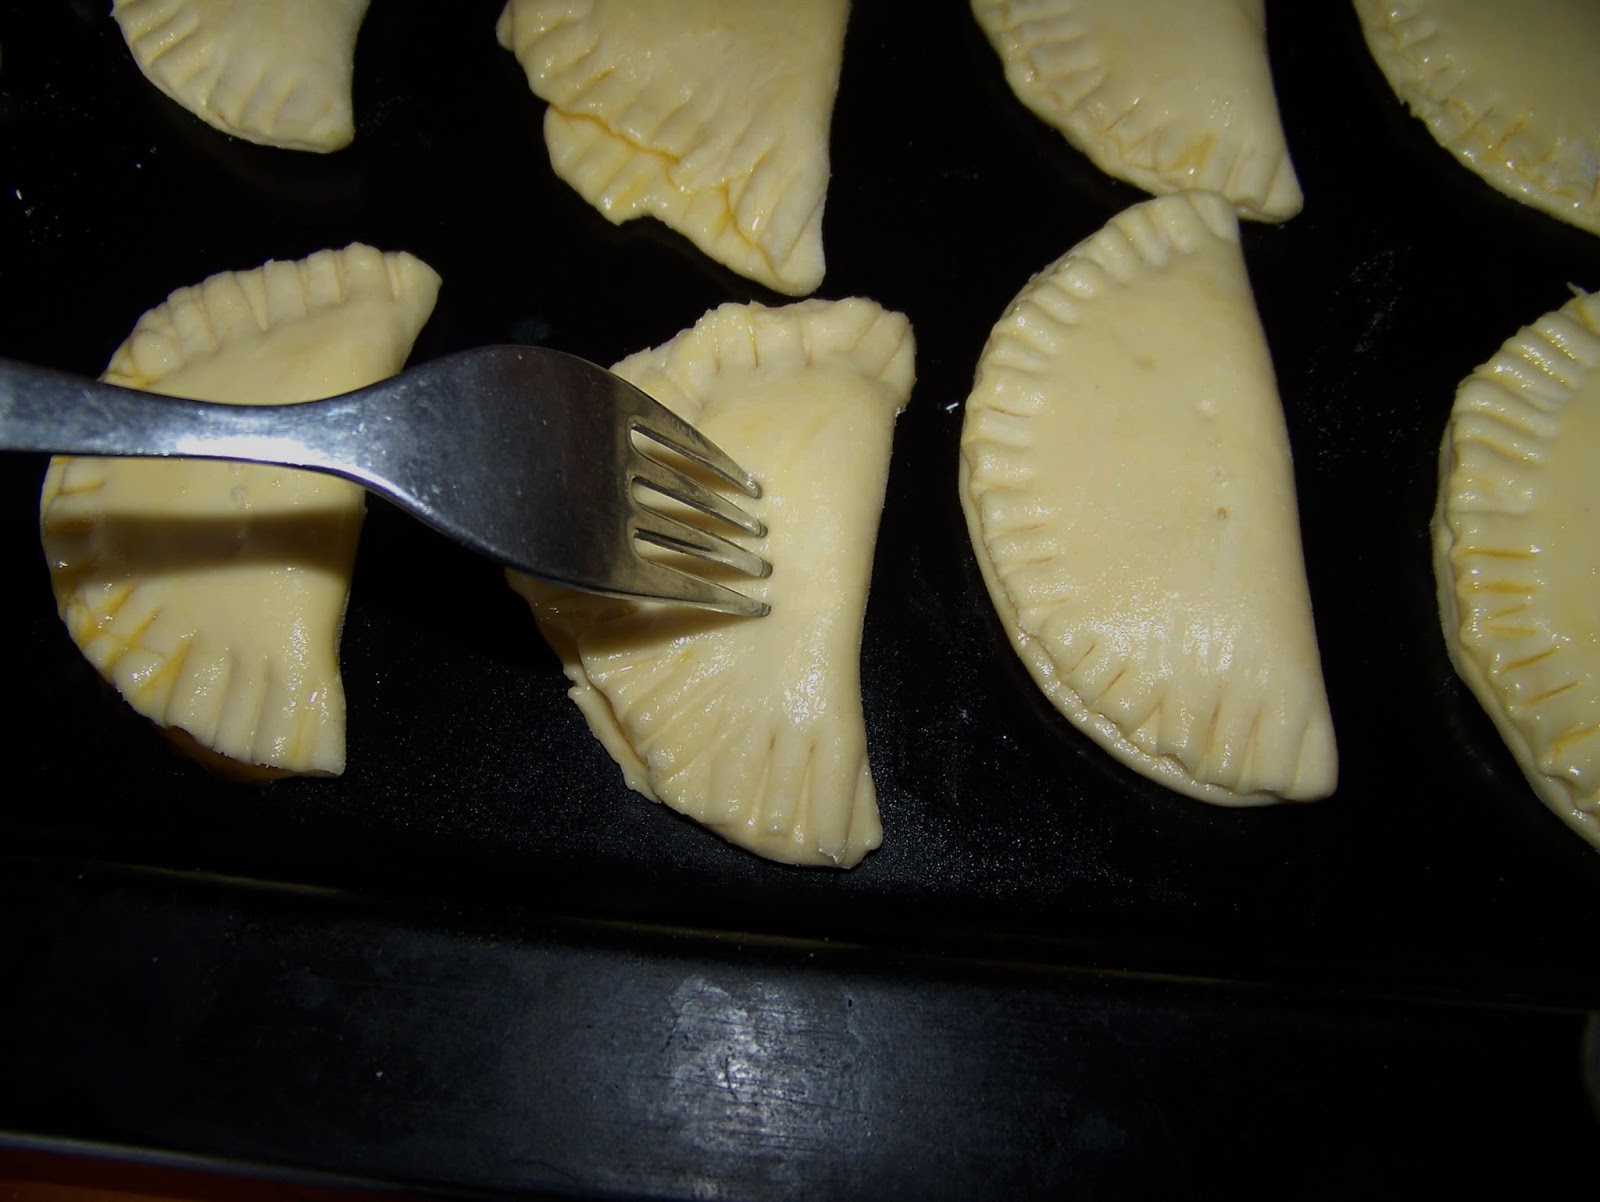
I beat one egg and painted the sides of the dough cutouts with the egg.
I folded the dough over into a semicircle and closed the sides with a fork.
I then brushed the egg over the tops of the tartlets. This gives the baked dough a lovely golden brown finish.
I laid the tartlets out on a sprayed baking tray. Put the tray in the fridge for about 15 minutes to half an hour before baking. It went into a preheated oven at 180°C for about half an hour. Watch the tarts and take them out once they are golden brown and you can smell them.
The store-bought dough was simply rolled out once, cut out and treated the same way as the rough puff pastry. I had to make holes in this pastry with a fork to allow the steam to escape. This is not necessary with the rough puff pastry.
Some of the jam escaped, but the tartlets are ready when they look like this.
Allow them to cool on a wire rack. This is what the tartlets look like that was baked with the homemade rough puff pastry.
This is what the tartlets look like that was baked with the store-bought puff pastry.
It is December holidays and kids and adults are passing through the house in hordes. I hardly had any left to put away, but if you can save them, you can put keep them in an airtight container for quite a while.
For more crafty ideas and great products, visit APrettyTalent.com.
Remember to keep nurturing your TALENT for making PRETTY things.
You can subscribe to this blog and receive regular updates by email by simply registering your email address at the top of the current blog.
This blog is about empowering everyone who has a talent for making pretty things, be it a latent or developed one. I bring you practical tips and tricks to make and do the things you've always wanted to.
Search This Blog
Tuesday, 29 December 2015
Monday, 28 December 2015
Sewing a Frilly Skirt
I have been wanting to make a skirt with layers for a very long time and needed little prompting to make it when I found myself with just the right fabric for the project. It is one of those patterns that seem very intricate, but really isn't. I will walk you through the process form beginning to end and you'll see that you have the skills required for the job.
Pattern layout:
When cutting the skirt, you can use just about any skirt pattern that you are comfortable with that has an elastic in the waist. Cut the pattern out twice on the fold.
Cut the waistband from the same fabric as the bottom layer of the skirt.
Lay the skirt on the middle layer's fabric. Move it up or down until you are satisfied with the length of the middle layer. Cut a strip of fabric the whole width of the fabric.
Now lay the cut strip of the middle layer on top of the top layer's fabric. Move it up or down until you are satisfied with the length of the top layer. Cut a strip from this fabric the whole width of the fabric.
Strengthen the waistband with iron-on vilene.
Sewing:
Lay the two ends of the waistband on top of each other. Sew and iron the seam open.
Fold the waistband double and iron it flat on the fold.
Measure the required length of elastic and sew it closed.
Lay the ends of the top layer together and sew.
Hem the top layer.
Sew the ends of the middle layer together.
Hem the middle layer.
Sew the side seams of the bottom layer/the skirt.
Hem the skirt/bottom layer.
Tack the top of the middle layer.
Tack the top of the top layer. Tack the skirt if your pattern requires it. Mine does not.
Pin the middle layer to the skirt, right sides facing out.
Pin the top layer to the two previous layers, right sides facing out.
Pin the waistband to the three layers of skirt, with the right sides facing each other. It is easier if you unfold the waistband at this stage.
Sew the waistband to the three layers of skirt. Allow a 20 mm seam allowance to make sure you catch all of the layers in the seam.
Pin the elastic to the inside of the waistband. This is the only part that is slightly tricky. Stretch the elastic as you pin it.
Fold the seams in and pin the inside of the waistband. You will once again need to stretch the elastic as you pin it.
Sew the waistband by hand.
Not as difficult as it seemed! Now, dress up and go have some fun!
For more crafty ideas and great products, visit APrettyTalent.com.
Remember to keep nurturing your TALENT for making PRETTY things.
You can subscribe to this blog and receive regular updates by email by simply registering your email address at the top of the current blog.
Subscribe to:
Posts (Atom)