I am teaching once again. The school where I started out as a young teacher was in desperate need of an English teacher and I agreed to go help out. It turned out that the Grade 11's were doing Chinua Achebe's book Things Fall Apart as their prescribed reader. In this book, the main character, Okonkwo, grows yams, a staple food in Nigeria, the setting of the book. I had never seen or tasted a yam and had a hard time explaining to the kids what this was. The other day I walked into my local greengrocer, and they had yams on the shelf! I immediately bought one, at much to high a price, to show to my pupils. Then I returned home with it and experimented with cooking it. Join me today on a taste exploration of yams!
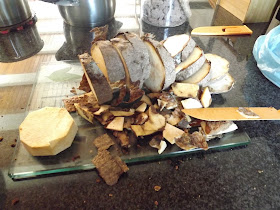
This is what the yam looked like.
On the inside it was stark white.
I noticed that it quickly started colouring due to oxidization once I'd cut it. For this reason, I hurried to get it in water.
I decided to cut the yam into thick slices before peeling it.
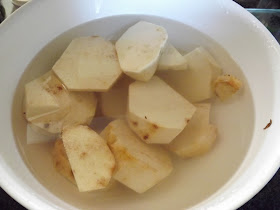
I put it in water to stop the oxidization, but also to wash it.
After tasting a small morsel of it, I realized it had a very bitter after taste. I therefore put it in clean salt water.
In the meantime, I brought a pot of oil to the boil.
I cut the yam into thin slices.
The slices were returned to the salt water to prevent them from discolouring.
Finally, I added the yam slices to the hot oil.
I prepared a plate with kitchen towels to drain the worst oil from the yams when it came out of the oil.
The yam slices soon started puffing up very interestingly.
I removed them from the oil when they had turned golden brown.
I tasted one and was appalled at the bitter after taste it still left in my mouth. I added some roast potato seasoning to the fried yams.
The seasoning improved the taste, but it was still far from delicious. I would try something else with the leftover yam slices.
This time I brought a pot of water to the boil and added a bit of salt and quite a bit of sugar.
I added the yam slices to the warm water and allowed it to boil.
I soon realized I would need a bigger pot and quickly transferred the yams.
When they had turned soft, I mashed them.
I added a scoop of butter and a little more sugar and gave it a quick stir.
I desperately hoped this would be better than the fried yams.
This version of the yams turned out absolutely delicious. It is very similar to sweet potato in taste and consistency. If I ever get my hands on another yam, I will boil it, mash it, add cream and honey, and then bake it in the over for a little while.
Two completely different versions of the same vegetable.
Marietjie Uys (Miekie) is a published author. You can buy my books here:
You can purchase Designs By Miekie 1 here.
Jy kan Kom Ons Teken en Verf Tuinstories hier koop.
Jy kan Kom Ons Kleur Tuinstories In hier koop.
Jy kan Tuinstories hier koop.
You can follow Miekie's daily Bible Study blog, Bybel Legkaart, here in English & Afrikaans.
You may prefer to follow the traveling blog, A Pretty Tourist.
For more crafty ideas and great product reviews, visit A Pretty Talent on Facebook.
If you are in a literary mood, follow Miekie's musings, stories and poetry on A Pretty Author - Miekie.
Remember to keep nurturing your TALENT for making life PRETTY.
You can subscribe to any of these blogs and receive regular updates by email. Simply register your email address at the top of the applicable blog.
This blog is about empowering everyone who has a talent for making pretty things, be it a latent or developed one. I bring you practical tips and tricks to make and do the things you've always wanted to.
Tuesday, 15 May 2018
Tuesday, 1 May 2018
Sew A Tissue Box
I tend to stay away from home for long periods on end. I have lovely tissue boxes at home that I have made with decoupage or mosaics, but when I travel I am forced to live with ugly tissue boxes. Today, I finally decided to put this to an end. I have sewn myself a tissue box from fabric. This way it is lightweight and can be as compact as I need it to be. This turned out so nice, I may actually use it at home as well! I show you how to do it yourself in today's blog.
Take the measurement of the tissue box as indicated. Add 3 cm for seam allowance.
Take the length of the box. Add 3 cm for seam allowance.
Take the width of the box. Add 3 cm for seam allowance.
Take the height of the box. Add 3 cm for seam allowance.
Measure the top and mark the space for the hole.
Cut all the necessary pieces from both fabric as well as lining.
Fold the top in quarters and cut a tine hole right in the centre.
Open up and mark clearly where the hole will go.
Cut open to the corners of the hole.
These were the measurements I worked on for my fabric tissue box.
Fold all the pieces in half to find the centres.
Line the centres up and pin down.
Leave a 1,5 cm seam allowance open and sew the sides to the middle part.
What is done in fabric, is repeated in the lining all the way through.
Cut the fabric open up the sewing line.
Fold the bottom piece up and pin to the side panels.
Sew at 1,5 cm seam allowance. Leave 1,5 cm seam allowance un-sewn at the top.
Pin the top to the fabric box.
Place the fabric on the 'lid' and sew all around the top.
When you reach the corners, drop the needle and turn the fabric.
Turn the fabric right side out. Leave the lining wrong side out.
The box is taking shape!
Put the lining inside the box with wrong sides facing.
Fold the openings in and pin.
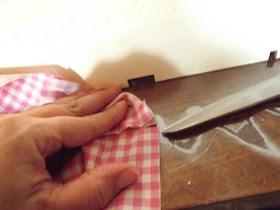
Sew the opening by hand.
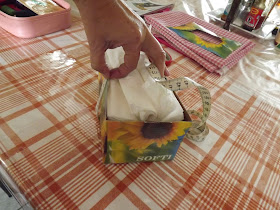
The box is now ready to be stuffed with tissues.
Slip the tissues inside the fabric box.
Bring on winter and the sniffles! We are ready!
Marietjie Uys (Miekie) is a published author. You can buy my books here:
You can purchase Designs By Miekie 1 here.
Jy kan Kom Ons Teken en Verf Tuinstories hier koop.
Jy kan Kom Ons Kleur Tuinstories In hier koop.
Jy kan Tuinstories hier koop.
You can follow Miekie's daily Bible Study blog, Bybel Legkaart, here in English & Afrikaans.
You may prefer to follow the traveling blog, A Pretty Tourist.
For more crafty ideas and great product reviews, visit A Pretty Talent on Facebook.
If you are in a literary mood, follow Miekie's musings, stories and poetry on A Pretty Author - Miekie.
Remember to keep nurturing your TALENT for making life PRETTY.
You can subscribe to any of these blogs and receive regular updates by email. Simply register your email address at the top of the applicable blog.


