Thursday, 31 March 2016

Sheet Music Art

For today's art project, we do something a little different with the background. We cover it with sheet music before starting our actual art. We then use a very limited palette to do the drawings with, allowing the background to speak where normally colour would have been the voice we used.


I did this drawing a couple of years ago and got my proportions so wrong that I ended up hating it. I packed it away and did not give it another thought until today when I was looking for a canvas. What you are looking at is a flat canvas that has been decoupaged with sheet music. I decided to cover the drawing with black gesso and start the process over.


As there were two of these to start with, I covered both drawings with the gesso and left them to dry.


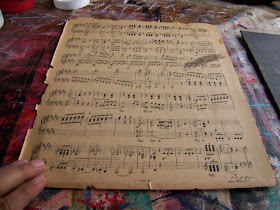
I then went in search of my sheet music. You can use new sheet music as well. I found this wonderfully aged book of sheet music in a secondhand book store and often use it in my art and craft projects. The only problem is that I have to be really careful as the paper has become quite brittle. If you can't get your hands on sheet music, try using newspaper print or even crossword puzzles, etc. Any number of backgrounds can be used with great success.


I paint a thick layer of Dala Acrylic Gel Medium on the dry gesso.


The sheet music is laid on top of the Acrylic Gel Medium and any trapped air bubbles are rubbed out.


Another thick layer of Dala Acrylic Gel Medium is then painted on top of the sheet music.


With both canvasses prepared in this way, I lay them aside to dry completely before continuing.


Once they are dry, I flip them over and use a craft knife to crop the sheet music to the same size as the A4-sized canvasses.


I use one of the designs available in the Digital Downloads tab on APrettyTalent.com, titled The Ladies.  I redraw the design freehand using a Black Posca Marker with a Brush tip.


I draw a male figure in more or less the same stance on the remaining canvas, again using the Posca marker from before.


I like how these two compliment each other and decide to go ahead with the project.


I add a couple of highlights using Dala Acrylic Drawing Ink in Golden Yellow.


Though the ink comes in a drop bottle, I unscrew the tap and paint the ink on using an Angle Paint Brush.


All acrylic inks can simply be washed out with water as long as they are wet. Once the ink has dried, it is permanent.


For the red that I add, I use Daler-Rowney FW Acrylic ink in Flame Red.


Again I simply touch the areas I want to highlight.


I then use Dala Drawing Ink Process Cyan to bring a cool color to the painting.


Assessing the paintings, I decide to break away from the primary colors.


My choice of color falls on FW Acrylic Ink in Sap Green.


I decide that adding anything more would be detrimental to the paintings and leave the ink to dry.


These paintings are available from APrettyTalent.com Gallery under Miekie


These paintings are available from APrettyTalent.com Gallery under Miekie.
For more crafty ideas and great products, visit APrettyTalent.com.Remember to keep nurturing your TALENT for making PRETTY things.
You can subscribe to this blog and receive regular updates by email by simply registering your email address at the top of the current blog.

Wednesday, 30 March 2016

Magnetic Chalkboard Labels

In today's blog we make a set of very versatile magnetic chalkboard labels. The idea behind this is that you can move the labels from one tin to another as you need to. Also, the chalk can be wiped clean and a new label written on it with zero effort. How cool is that? This is a really easy and quick project to do and will you will have pretty labels to mark your tins with in less than an hour.


I started by painting three coasters with White Gesso.


Once the gesso was dry, I would paint them with Chalkboard Paint. Both Heritage and Dala have marvelous colour ranges in this. My choice fell on Teal. A common misunderstanding among crafters these days, is the difference between chalk paint and chalkboard paint. Chalkboard paint is used to paint any surface that will be used to write on with chalk. Chalk paint is a versatile paint, often used to paint furniture with, that will cling to a variety of surfaces. It is called chalk paint because of its distinctive dull chalky finish.


When painting the coasters, make sure to paint the edges as well for a neat finish.


Once the first coat of paint is dry, apply a second coat. You may even want to apply a third if the coverage is not monotone and smooth yet after the second coat.


While waiting for the paint to dry, I prepare a template. I have this marvelous stencil, but I want the reverse of one of its designs. I find myself an off-cut piece of paper to cut the template from.


Laying the stencil on the paper, I trace the outline with a pencil.


I then use a craft knife to cut the template along the pencil lines.


The frame that is left after the template is cut out, is saved for another day. Nothing ever gets discarded in my craft room.


I then lay the template in place on top of the coaster.


I use Dala Fabric Spray in Red to spray the coaster.


Removing the template, you can now see that I have created a pretty little border for my label, while leaving the majority of the surface untouched so you can use it to write your chalk messages on.


The same template is used on the second coaster, after I have flattened it again. The wetness from the Fabric Spray caused it to curl up. It flattened again without a hassle.


With the three coasters done, I lay them aside to dry.


This template looks quite pretty when I am done with it. It too, goes into a box to be used in another project at a later date.


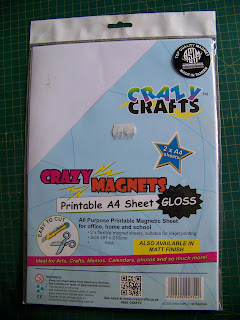
I now go in search of my magnet sheets.


I cut strips of 2 cm x 6 cm from these magnet sheets.


I will need 6 magnetic strips in total.


I use Tombow glue on the backs of the magnet strips.


The magnets are glued to the backs of the coasters.


Once everything is dry, the mini chalkboards are ready to be written on.


The chalk wipes away as easily as on any other chalkboard.


Your set is now ready to go on your tins.


This is over kill for the poor tin I chose to use as an example, but you can see where I'm going with this.


For more crafty ideas and great products, visit APrettyTalent.com.
Remember to keep nurturing your TALENT for making PRETTY things.
You can subscribe to this blog and receive regular updates by email by simply registering your email address at the top of the current blog.

Tuesday, 29 March 2016

Date, Almond & Cherry Coffee Cake With A Sourdough Starter (alternatives given)

I found this delicious looking recipe for a Coffee Cake in one of my recipe books and decided to try it out. As per usual, for me, I adapted the recipe so that I could use my Sourdough starter. I also changed the suggested fillings of the original recipe completely. I give advice for using alternative raising agents in the blog as well.


This is the recipe book the original recipe came from.


And this is the original recipe.


Warm 1/4 cup (60 ml) of milk to lukewarm.
Option 1: If you are using active dry yeast, you should add a package to 1/4 cup of lukewarm water and let it sit until if becomes frothy. Adding some of the sugar to the water may speed the process up.


Add 1/4 cup sugar and 100 g butter to this and stir until everything is dissolved or melted.


Add a cup of your sourdough starter to this and mix well.


Add 3 cups (750 ml) Cake Flour and 5 ml (1 teaspoon) salt to a bowl and mix well.
Option 2: If you are using Instant Dry Yeast, you should add a packet to the dry ingredients and mix well.


Add the liquids and one egg to this and mix.


Bring the dough together.


Turn the dough out onto a floured surface and knead into an elastic ball. Add more flour or water as needed, but add it in very small increments.


Place the ball in a bowl.


Cover with plastic and let it double in size in a warm dry place.


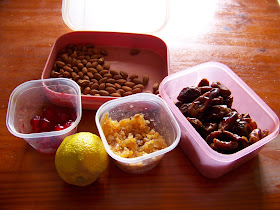
In the meantime, get your filling ready. You will need almonds, cherries, dates, lemon rind and orange rind to start with.


Boil 1 cup (250 ml) dates in half a cup of water to soften them slightly. Once the water starts to boil, the dates will be ready.


Chop the almonds roughly. Add it to the dates in the pot.


Grate the peel of one lemon into the mixture.


Chop 1/2 cup (125 ml) of cherries roughly and add them to the pot as well. Also add 2 teaspoons of orange rind, or the grated peel of one orange.


Add 2 tablespoons (25 ml) of sugar, 1/4 teaspoon nutmeg and 75 g butter to the pot. Stir to dissolve and melt everything.

If the mixture is very runny, thicken it with a little flour and water paste. Allow to cool.


Once the dough has risen, prepare a bake sheet with non-stick spray and flour. Prepare your work surface with flour as well and knock the dough back.


Roll the dough out in a rectangular shape on the baking sheet.


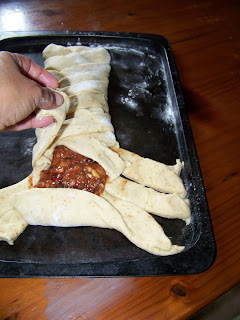
Put the filling in the middle of the dough.


Use a sharp knife to cut thick strips at an angle on both sides of the filling. Cut up to the filling.


Fold the ends in.


Fold the strips in from the sides.


Beat an egg.


Coat the cake with the beaten egg to give the cake a lovely shiny finish when done.


Cover with plastic and allow to double in size in a warm dry place.


Remove the plastic once risen.


Bake for about 30-35 minutes in a preheated oven at 180°C.


Allow to cool on wire rack.


To prevent a hard crust from forming, you can place a damp tea towel over the still hot cake.


Slice and enjoy hot or cold.


For more crafty ideas and great products, visit APrettyTalent.com.
Remember to keep nurturing your TALENT for making PRETTY things.
You can subscribe to this blog and receive regular updates by email by simply registering your email address at the top of the current blog.